THE HQ PORTAL
How to Create Users and User Settings
SETTING UP A NEW USER
This guide will show you how to add a new user to your Company portal and induction system and all the settings that are available for a user.
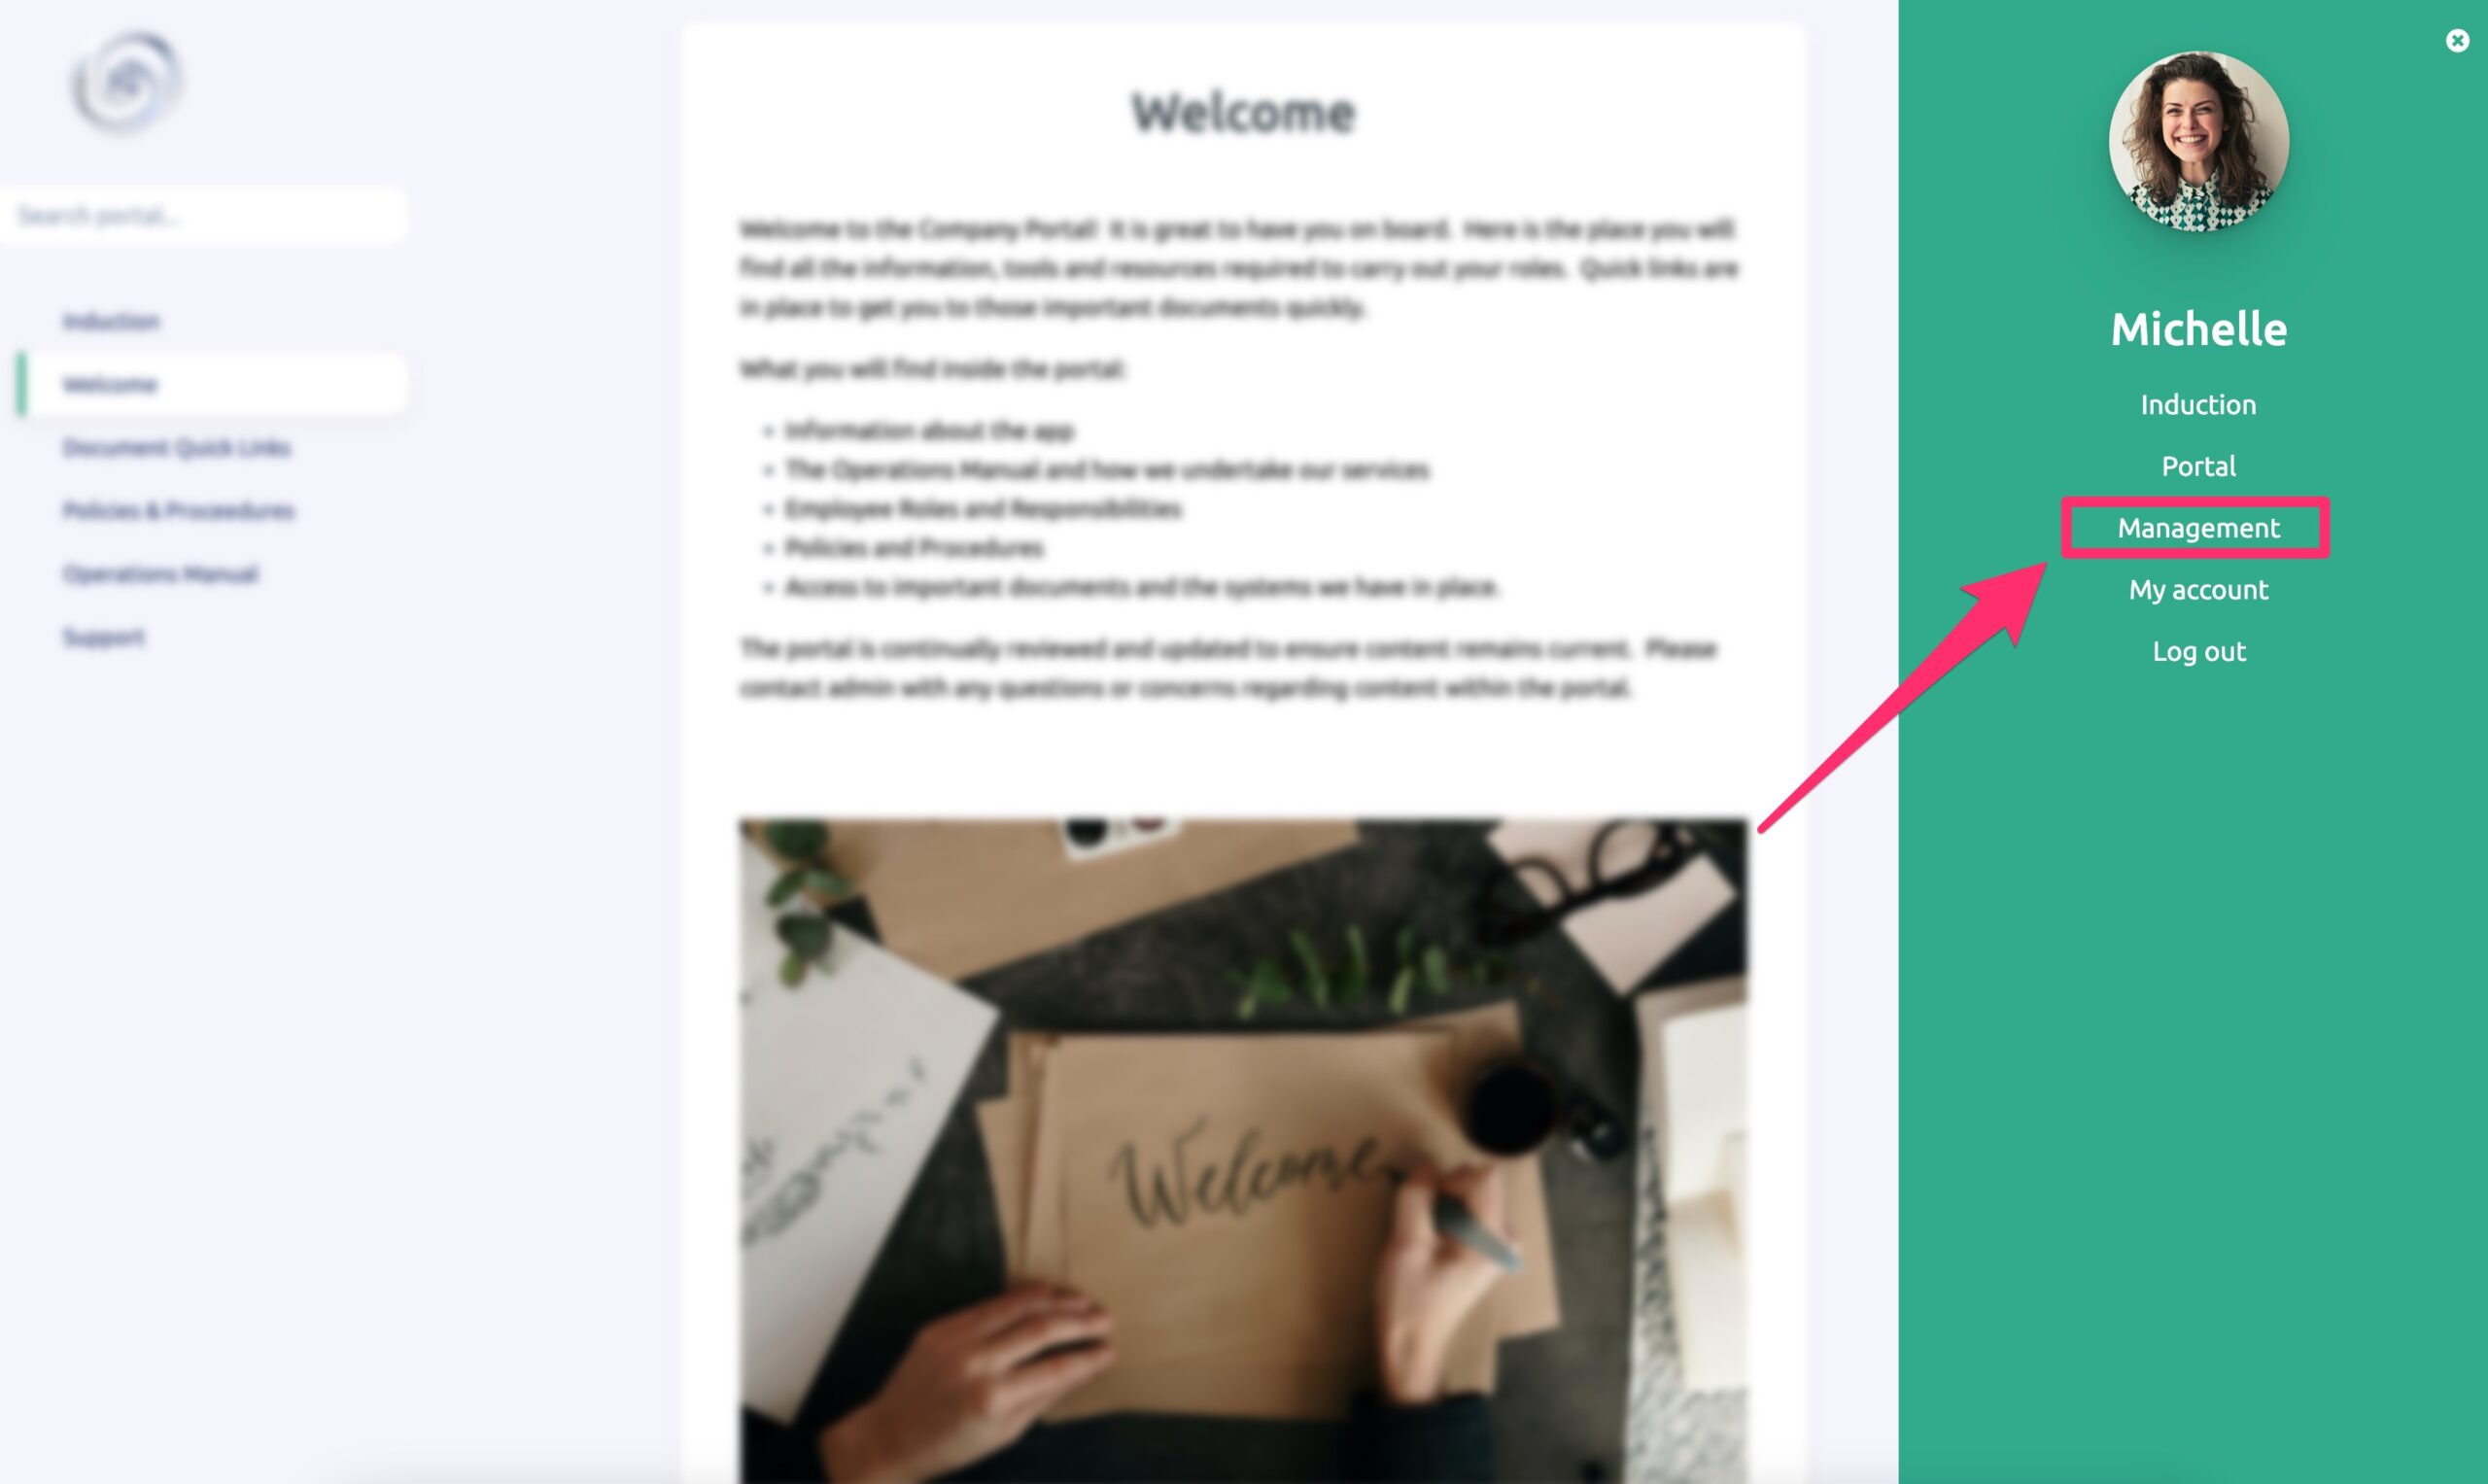
- Navigate to the “Users” tab in the management section of the portal.
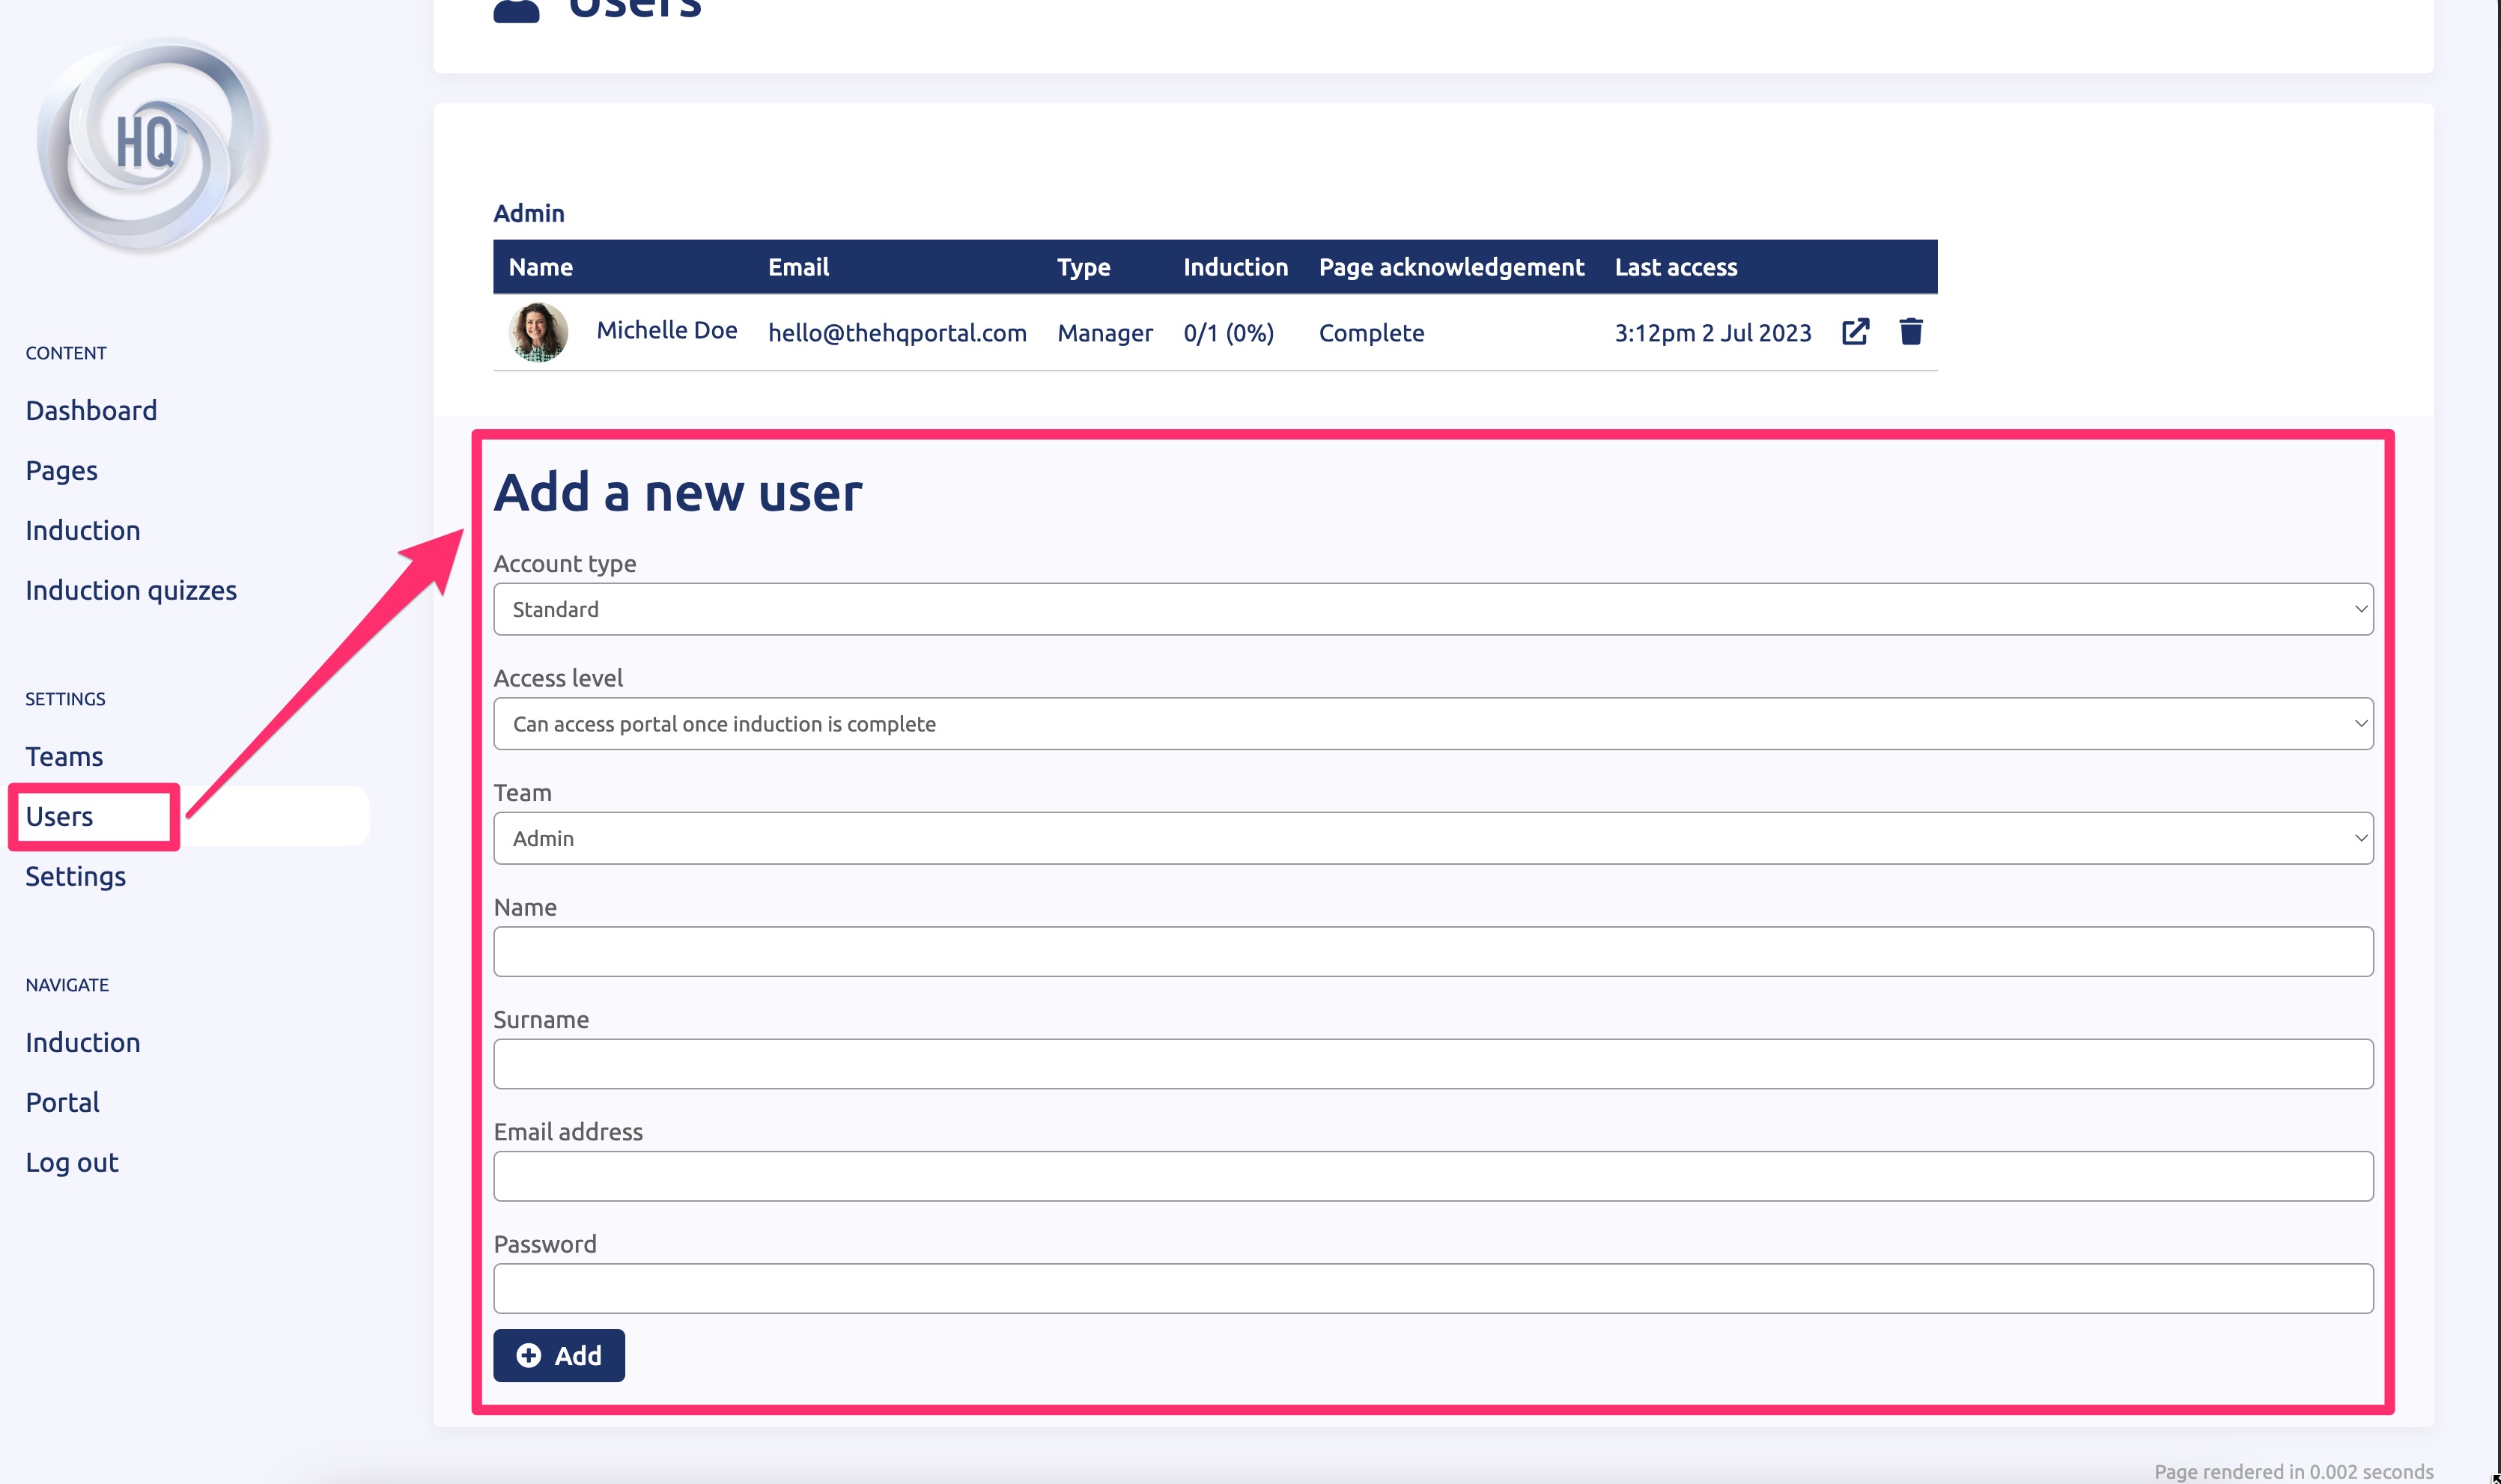
2. Click on the “Users” option in the main menu on the left and scroll down to the bottom of the page where you will find the “Add new user” section. Once you have filled in all the fields in this section, click on the “Add” button.
3. Once a new user is added, you will need to send them an email with their login details and how to access the portal. For more instructions on this step you can look at this page.
BREAKDOWN OF USER SETTINGS:
Here is a breakdown of the different settings you can apply for the user:
Account Type |
|
|
Standard: |
This type of user will not have any “edit” permissions and will not be able to access the management section of the portal. They will only have “view” access to the induction system/portal. |
|
Manager: |
This type of user will be able to access the management section of the portal and edit all content. |
Access Level |
|
|
Can access portal once induction is complete: |
This setting requires the user to complete the induction section to 100% first before they are given the ability to access the main company portal. |
|
Can only access the induction system: |
This setting only allows the user to access the induction section of the portal. Even if they complete the induction to 100% they will not have access to the main company portal. |
|
Can only access the portal: |
This setting only allows the user to access the main company portal and will not have access to the induction section of the portal at all. |
Team |
|
|
Team selection: |
Here you can set the team that the new user will be a part of. To find out more information about how Teams work click here. |
User Details |
|
|
Name: |
The user’s first name |
|
Surname: |
The user’s surname |
|
Email Address: |
The user’s email address |
|
Password: |
Here you can set the password for the user. Make sure to set a secure password that includes a mix of capital letters, lower-case letters, numbers and special characters for increased security. |


